
Start a Checklist
Whether you are performing a daily safety inspection, completing an autonomous maintenance sweep, or carrying out a quality audit, starting a checklist in TeamAssurance takes just a few taps.
This guide covers the three primary ways to launch a checklist and how to navigate through your checks on the shop floor.
3 Ways to Launch a Checklist
Depending on your daily routine and workstation set-up, you can access active checklists using any of the following methods:
1. From the Checklist module
Best for: Ad-hoc inspections, incident checks, or un-scheduled audits.
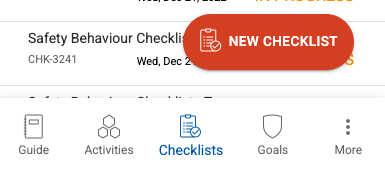
- Navigate to Checklists in the main navigation menu.
- Tap the NEW CHECKLIST button (bottom right)
- Search or select from the Templates list (e.g., Safety Walk, 5S Audit, Quality Check).
- Tap Start and select the relevant team if prompted.
2. Scan a QR Code
Best for: On-the-spot inspections, machine-specific routines, and site audits.
Pre-requisite: someone has printed the QR code for a template or schedule.
- Open the camera app on your mobile device or tablet.
- Point your device camera at the QR code located on the machine, workstation, or area asset tag and scan.
-
The corresponding checklist will open immediately.
3. From Your Scheduled Tasks & Huddle Board
Best for: Daily/shift routines and recurring operator checks.
- You will receive an email notification with a link if a schedule is assigned to you. But you might also have an Asset Report displaying the schedule, or have a Filtered Checklist report on your Team Dashboard. Otherwise checklists assigned to you can be found via your personal Task List.
- Locate the scheduled checklist and open.
-
The checklist will display, and you can tap START or CONTINUE.
Executing the Checklist
Once your checklist is open, follow these operational best practices:
- Answering Questions: Select your responses (Pass/Fail, Yes/No, or numeric entries).
- Adding Evidence: If a step requires proof or clarification, tap the Camera icon to capture a photo or video directly within the question.
-
Adding Notes: Tap the Note icon to attach context or comments to specific checks.
What if a Check Fails or Out-of-Spec Conditions Occur?
If an answer triggers a fail condition, do not leave it unmanaged:
- Flag a Issue / Task: Tap Link on the flagged question to raise an action and assign with a due date, or Quick Link to raise an action that will be set as completed (e.g. to make a record that the issue was resolved at the time).
- Assign Context: Select a brief description, assign a priority level, and assign it to a responsible owner.
-
Continue the Run: Complete the remaining questions in your checklist—your flagged action will automatically link to this completed checklist.
Submitting Your Checklist
Once all required questions are answered:
- Tap Mark as Done (or Save in Progress if you have not finished and will return to it later).
- The completed report status is instantly updated, and real-time operational data updates across your team's dashboards.