
How to Schedule Recurring Checklists
Automating your routine processes ensures that critical maintenance, safety audits, and operational tasks never slip through the cracks. The Schedule Checklists feature allows you to set up recurring checklists that are automatically assigned and notify your team when it's time to act.
Here is a comprehensive guide to viewing, filtering, and creating scheduled checklists.
Overview & Permissions
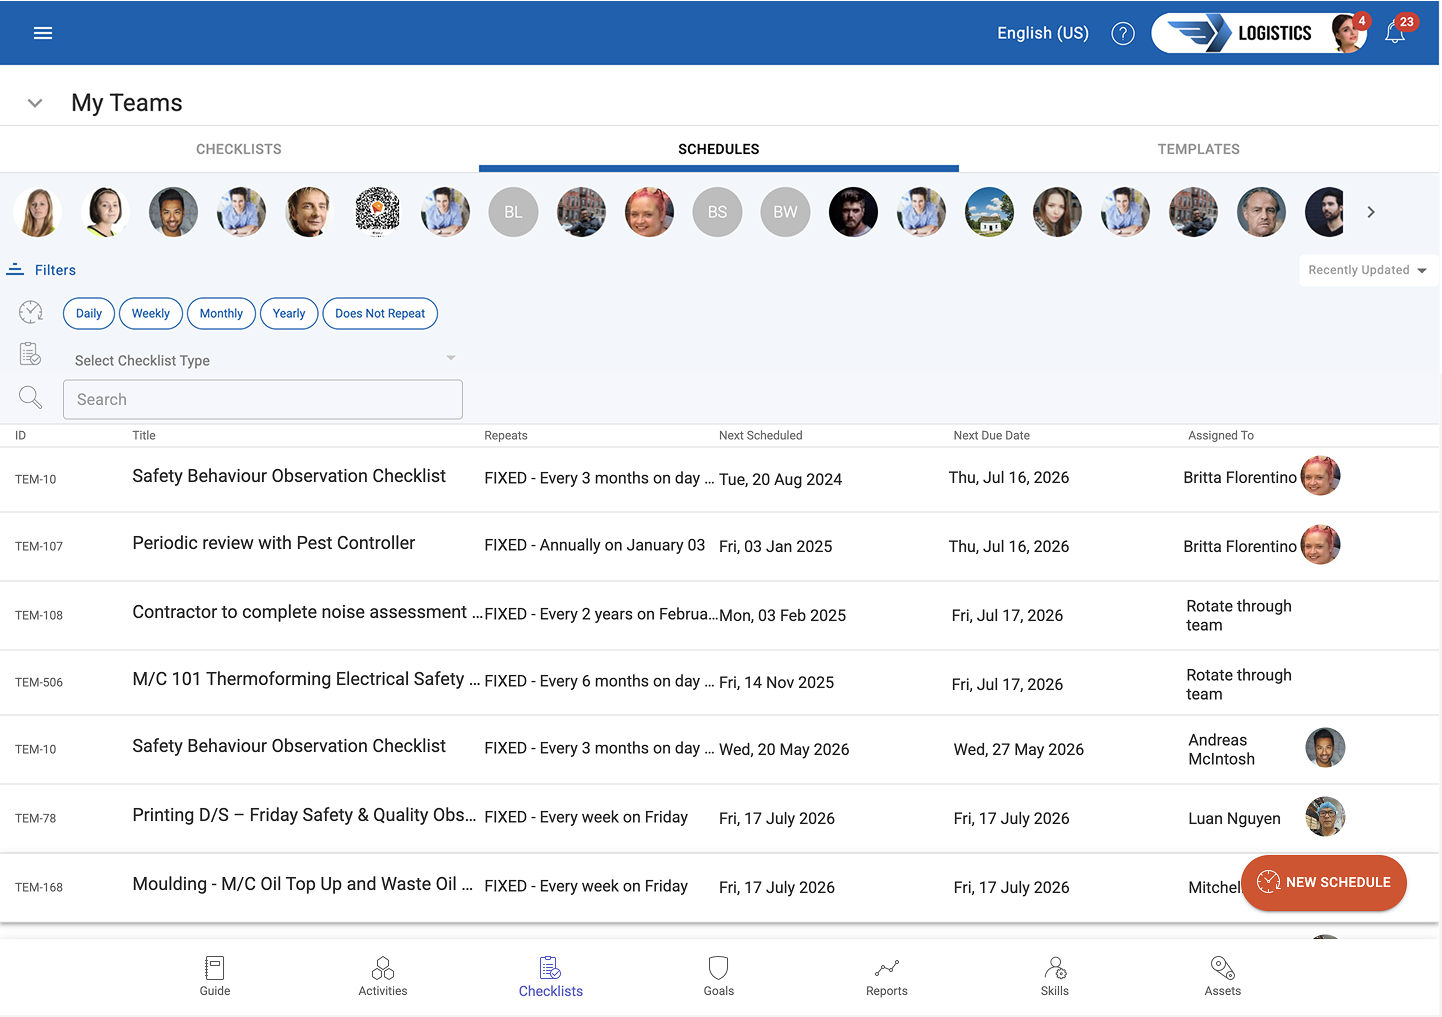
The Schedules tab within the Checklists module provides a centralized dashboard of all regularly recurring checklists across your organization.
- Frequency Options: Checklists can be scheduled on a daily, weekly, monthly, or annual basis, as well as via custom intervals (e.g., every 3 months).
- Permissions: To schedule a new checklist, you must be designated as a Checklist Admin. Checklist Admin permissions are granted by your system administrator via the Team Members list.
Finding Existing Schedules
If you need to review or audit what is currently automated in your system, you can easily sort through the master list.
- Navigate to the Schedules tab under Checklists.
- Use the Filter option at the top of the page to search for specific checklists, teams, or frequencies.
-
Review the current configurations directly from the filtered list.
Step-by-Step: Scheduling a New Checklist
If you have Admin permissions, follow these steps to schedule a checklist for your team:
Step 1: Select Your Template
Click the button NEW SCHEDULE and select the checklist template you want to schedule (e.g., Heavy Machinery Pre-Start).
Step 2: Define Basic Details
Fill out the required fields:
- Checklist Title
- Start Date: Select the calendar date when this schedule should first become active.
- Time Zone: Select the appropriate time zone. Generally this does not need to be changed. Note: This is highly useful if you are setting up tasks for a team operating in a different geographical region.
- Repeat: By default the checklist schedule is set be a single scheduled event (Does not repeat).
Step 3: Set the Recurrence Pattern
Toggle the Repeat settings to match your workflow:
-
Standard Intervals: Select Daily, Weekly, Monthly, or Annually.
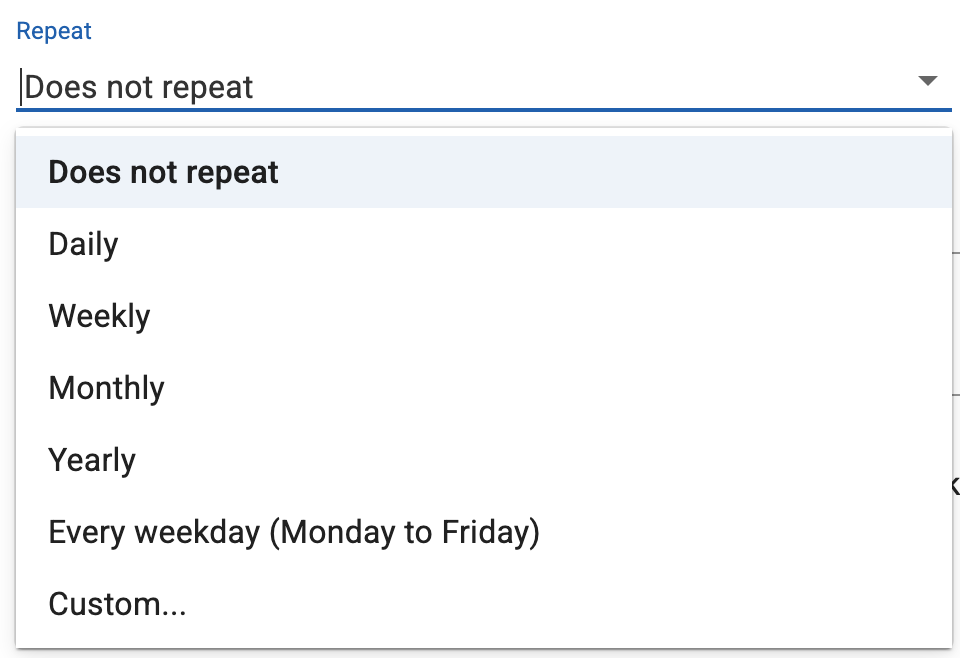
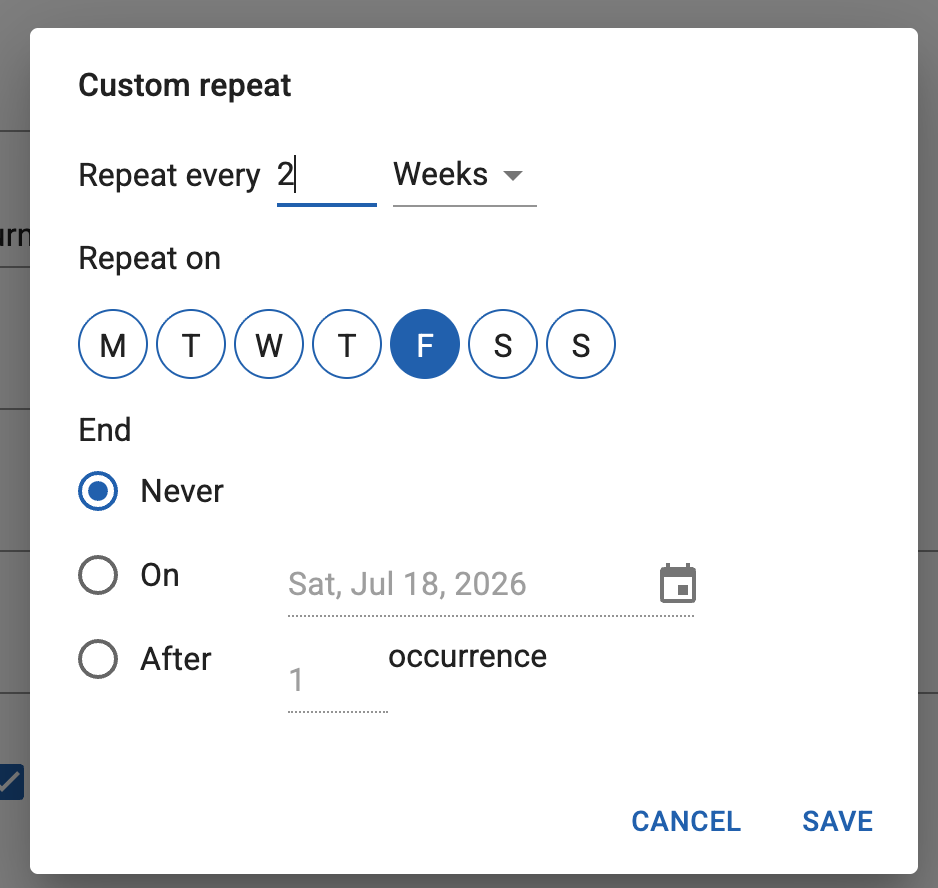
- Custom Intervals: Select Custom to define specific rules. For example, you can set a checklist to repeat "every X months."
-
End Conditions: Choose whether the schedule Never Ends, ends after a Specific Date, or ends after a Set Number of Occurrences (e.g., stop after 5 times).
Step 4: Repeating schedule timing
When a Repeat is configured (e.g. Daily) then additional settings are displayed
Start time: By default each checklist is scheduled to be created early on the day (prior to 4am). It does not start then, but is assigned to the relevant person.
Fixed: A fixed schedule follows a rigid timing. Each future event is scheduled for a specific day, and even if a previous checklist is finished early (or late) it will not impact the start time of future checklists.
Variable: A variable (or floating) schedule adapts dynamically based on the end date of the previous checklist.
example: Weekly on a Wednesday. For FIXED, the checklist is scheduled every Wednesday into the future. For VARIABLE, the first is scheduled for a Wednesday, and if it is completed on Friday then the next checklist is scheduled to start the following Friday.

Step 5: Set the Assignee
- Assigned to Team: Choose the responsible team
- Assigned To: Choose the team member responsible for the checklist. By default, this will automatically populate with the Team Leader, but you can manually select anyone from the team.
Step 5.1: Rotate through team
When a Repeat is configured (e.g. Daily) then an additional option is available in the Team Member list: Rotate through Team.

This option will let the system randomly assign the first checklist to someone in the team. The following events in the schedule will then be assigned to each team member in turn. This is useful to spread the load and responsibility throughout the team.
Step 7: Set the Completion Window (Due Dates)
To ensure accountability, define how long the assignee has to finish the task once it generates:
- Time to Complete: Define the duration (e.g., "End of day").
- Overdue Rules: If the assignee takes longer than the allocated time, the checklist status will automatically become Overdue and the Due Date will be colored red.
-
Automatically discard when overdue: To prevent a build up of overdue checklists, check this box and any overdue checklists will have the status automatically changed to Discarded

Step 5: Save and Automate
Click Save. The checklist will now appear in your list of active scheduled templates.
Notifications & Workflow: What to Expect
Once a schedule is saved, TeamAssurance handles the communication automatically:
📩 Initial Setup Notification: The assigned team member will receive an immediate email notification informing them that a recurring checklist schedule has been set up for them.
📅 Routine Triggers: On the day the checklist is scheduled to trigger (e.g., the first day of every month), the assignee will receive a prompt email stating that the checklist is available and it is time to kick it off.