Power BI connector (Azure storage)
Visualise your TeamAssurance data in PowerBI and create your own reports.

This will establish a connection to send TeamAssurance data to Microsoft storage in your organization's environment. Power BI then reads from that storage when producing reports
How long does this take to set-up?
This is a one-time set-up, which may take an hour or so. After that, data is automatically refreshed every 24 hours. Power BI reports can be created at any time.
Updates
If you have previously setup the PowerBI Connector, and just looking to run the updated json files, refer to the article Update PowerBI Connector
What's needed?
- This Power BI connector is designed so that anyone can set it up. No specialised knowledge is needed.
- A subscription to Azure - Microsoft’s cloud storage. Power BI needs to point to storage containing TeamAssurance data, and Microsoft Azure is how we do that. The "connector" is effectively a few files that are uploaded to Azure.
- Power BI Pro licence, or higher. To build reports and optionally embed them back into TeamAssurance
How to do it
This is a once off set-up.
- First, request the following from support@teamassurance.com
- API Key (per site)
- Site Code (or multiple codes if multiple sites)
- json files (to configure Azure)
- A subscription to Microsoft Azure. You can start with a free subscription. Total costs are typically in the order of single dollars to $10’s of dollars per month
A. Set up data storage in Microsoft Azure
Deploying the Storage Account and Key Vault
-
Find your Azure AD Object ID and make note of it.
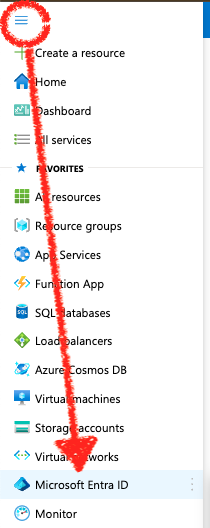
Go to the top-left menu > Microsoft Entra ID

b. Select the Menu item "Users"
c. Select the relevant user and copy the Object ID

d. Identify the Resource Group you will use, or create a new Resource Group. Open the Resource Group

e. Search and select Deploy a Custom Template

f. Click Build your own template in the editor
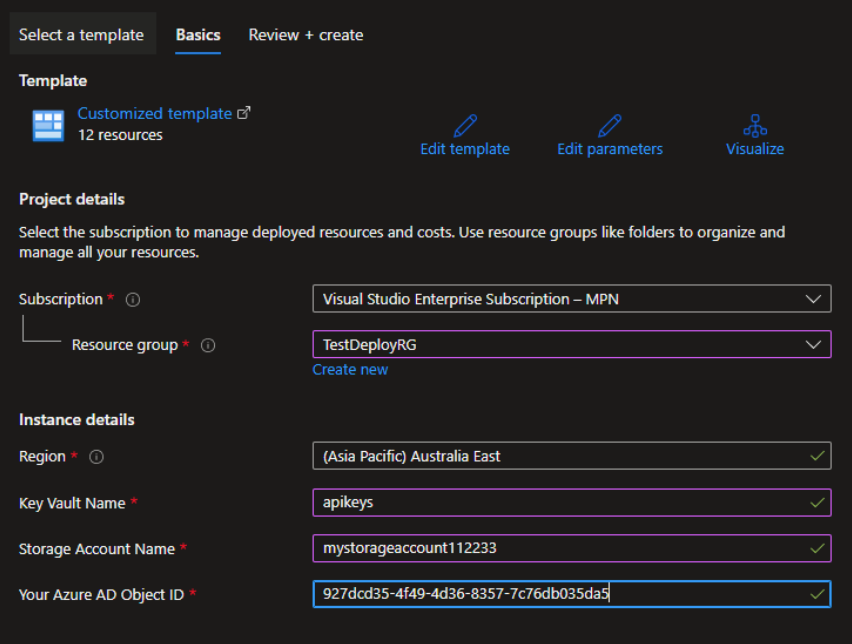
- Subscription
- Resource Group
- Region
- Key Vault Name. You can name it here and it will be created on Save.
- Storage Account Name. You can name it here and it will be created on Save.
- Your Azure AD Object ID. This is the Object ID from step c.
-

i. Click "Review and create" then "Create". Wait for the deployment to complete.
B. Connect Azure to TeamAssurance via API
a. Deploy the Logic app services
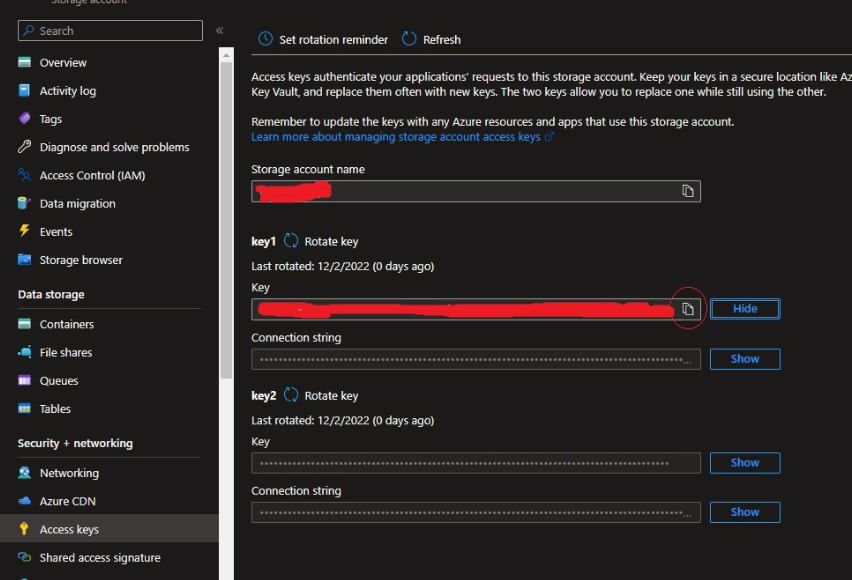
- Open the Storage Account you created
- Select "Access Keys"
-
Copy the Key to another place

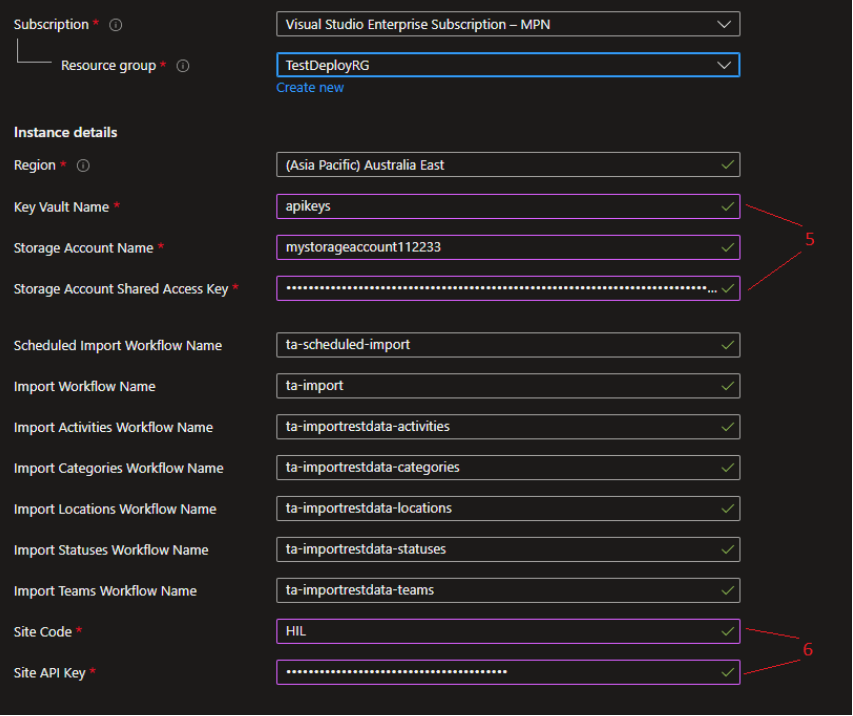
- Deploy a custom template. This time select "2. Deploy-LogicApp-Services.json"
- Fill in the Key Vault Name, Sitorage Account Name, and the Storage Account Access Key (from step 3)
-
Fill in the Site Code/ID and the API Key (that you requested from TeamAssurance Support)

- Click "Review + create" then "Create". Wait for the deployment to complete.
b. Run file 3
- Deploy a custom template, this time select “3. Update-Tables.json”
- Click “Review + create” then click “Create”. Wait for the deployment to complete.
c. Run file 4
- Deploy a custom template, this time select “4. Update-Workflow-Logic-Apps.json”
- Click “Review + create” then click “Create”. Wait for the deployment to complete.
C. Granting Access to the Key Vault
a. ta-import
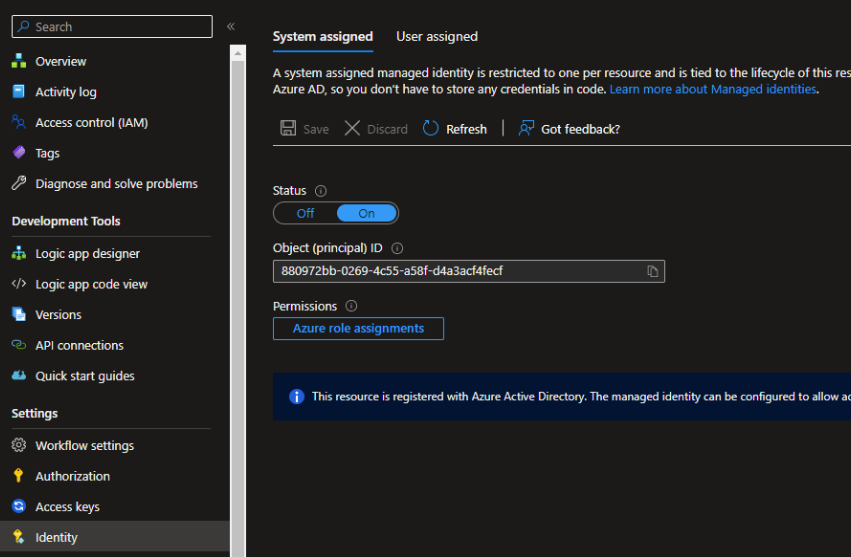
- Open ta-import Logic app
-
Click "Identity" and copy the Object (principal) ID
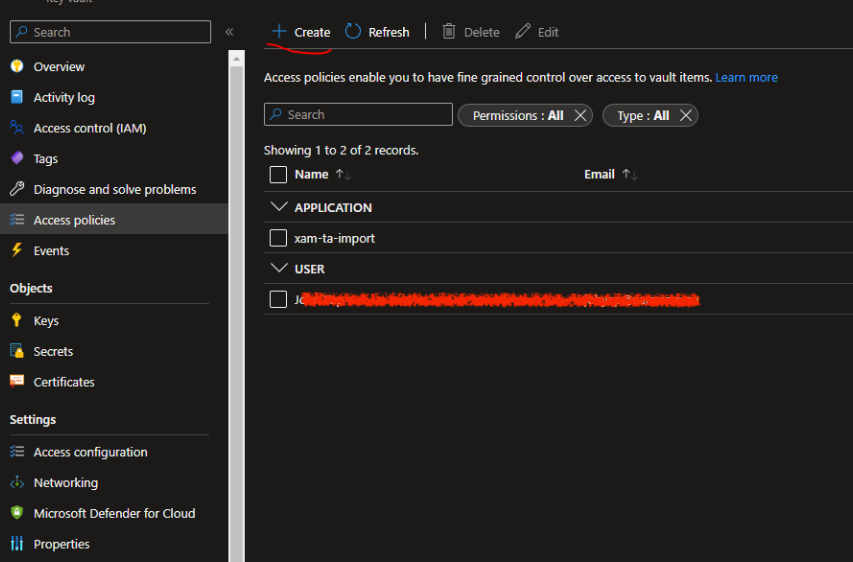
3. Open the Key Vault

4. Select Access Policies. Click Create
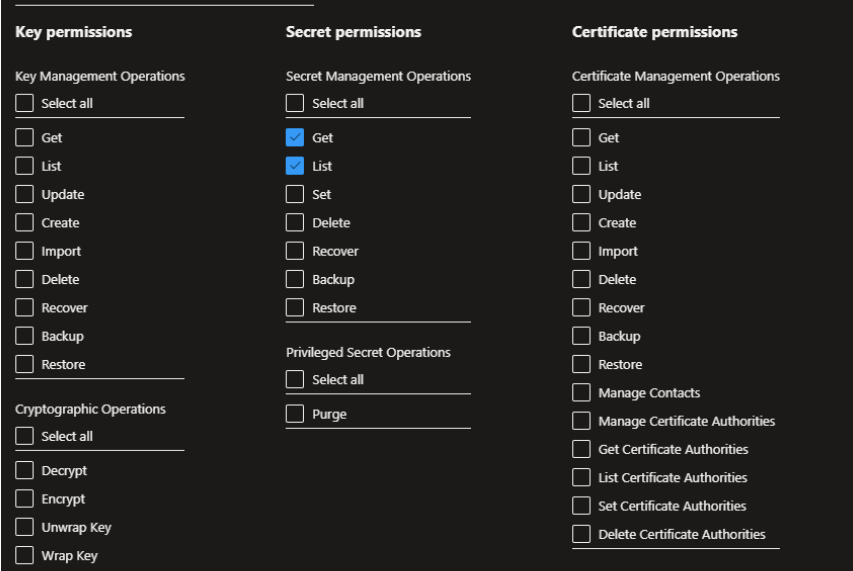
-
In Permissions, under "Secret Permissions", select GET and LIST and click Next.

- In Principal, paste the Object ID from step 2 in the search box and select the identity that matches. Click Next.
- In Application (optional), click Next
- In "Review + create", click Create
b. ta-import-site
Same as above, but for another Logic App.
- Open the ta-import-site Logic app
-
Click "Identity" and copy the Object (principal) ID
- Open the Key Vault
-
Select Access Policies. Click Create

-
In Permissions, under "Secret Permissions", select GET and LIST and click Next.
- In Principal, paste the Object ID from step 2 in the search box and select the identity that matches. Click Next.
- In Application (optional), click Next
- In "Review + create", click Create
D. Test
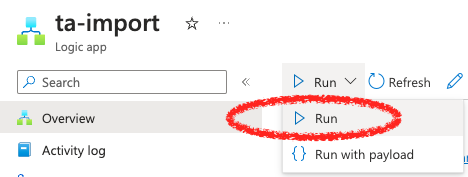
- Open the Logic App named ta-import
-
Select Run > Run
- The import will start, and depending on the amount of data already created in TeamAssurance, can take a minute or an hour or more
- You can click Refresh (see above image) to see where the import is up to
- Assuming it works, then the next import will occur overnight (see next step)

E. Wait for overnight data synch
TeamAssurance data automatically imports to Azure storage according to a default schedule (every 24 hours). To change the scheduled time, see the instruction in the ADDENDUM of this article.
To visualise the data, connect to PowerBI, Tableau or the charting software of your choice. The instructions below are for PowerBI.
F. Connect Azure storage to Desktop PowerBI
-
Open the desktop version of Power BI.
NOTE: This step can only be done in the desktop version of PowerBI, not the online Microsoft365 version. A Premium or Pro PowerBI licence is required.
-
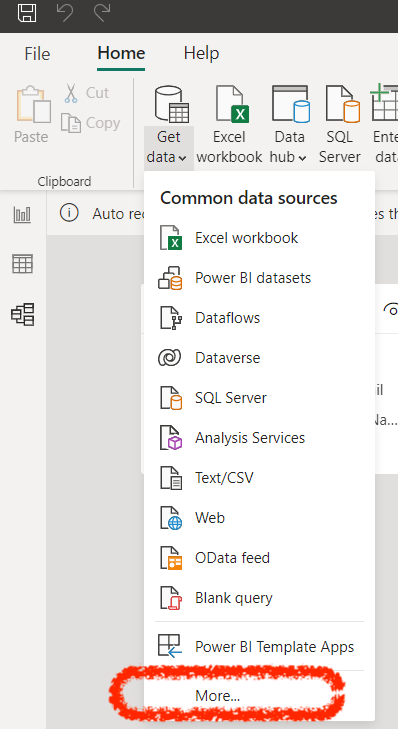
Select Home > Get data > More
-
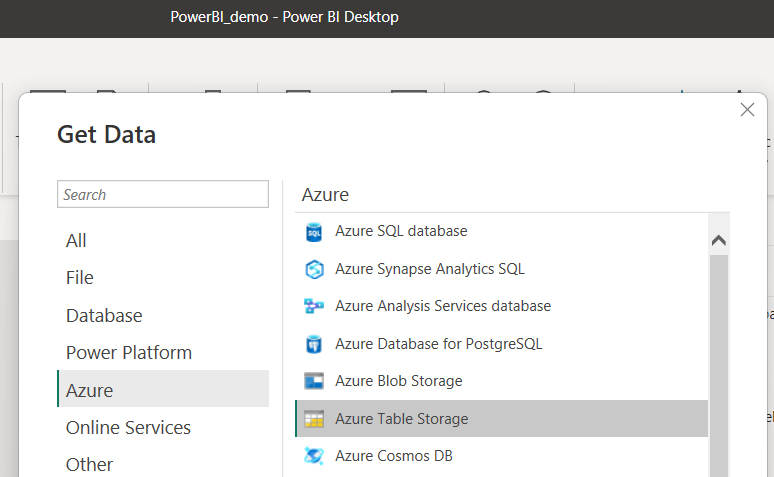
From the More dialog, select Azure > Azure Table Storage
-
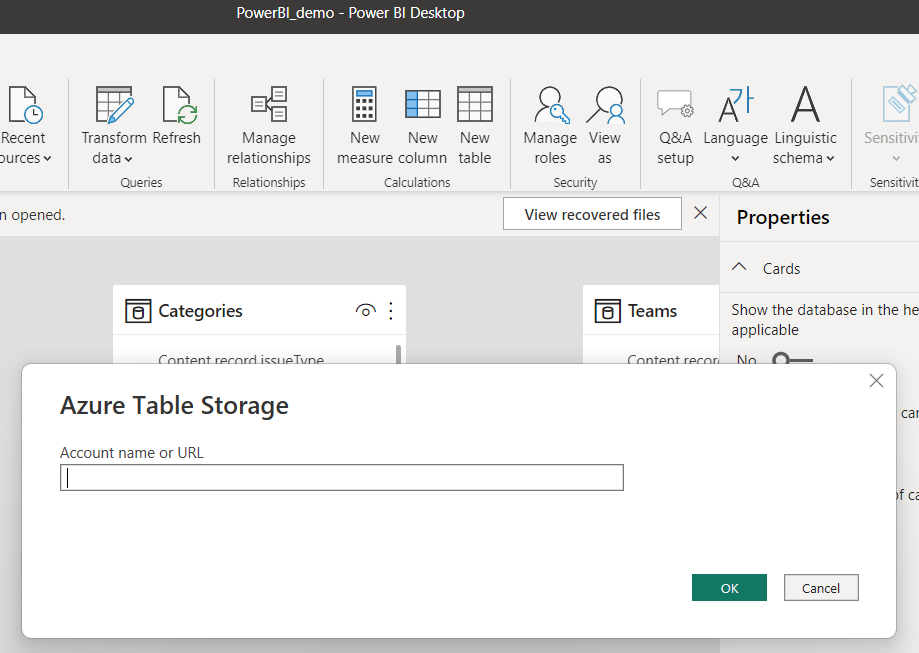
Add the Storage Account Name and connect


F. Format tables and data
Click on the 3 dots menu > Edit Query
Review the data and transform if required (Transform tab > Parse data > json)

G. Publish and create PowerBI reports
When the data is in the desired format, it can be published. This will make the data available in the online version of PowerBI.

Reports can now be created in the online PowerBI Service.
Of course, these reports can also be embedded back into TeamAssurance Dashboards.
Addendum
How to: Add a New Site for Processing
- Open Key Vault
- Select Secrets. Click Generate/Import
- Fill in the following values:
- Name - input the TeamAssurance Site Code
- Secret value - API key
- Click Create
How to: Change the Scheduled Run Time
- Open the Scheduled Import Workflow Logic App
- Click “Logic app designer”
- Expand “Daily Schedule”
- Set “Start time” to the desired start time
