Skills Setup
Follow these steps to create the Skills Matrix.
Note that the Skills matrix won't be displayed (and Team Members won't see their Skills) until step #5. This allows you to craft the detail in each Skill before going live.
- Create Roles and Skills
- Assign Skills to each Role
- Add Roles to Team Members
- Add Training Events (optional)
- Go Live: change Skill Status to Active
Watch the video, or skip to follow the written instructions below.
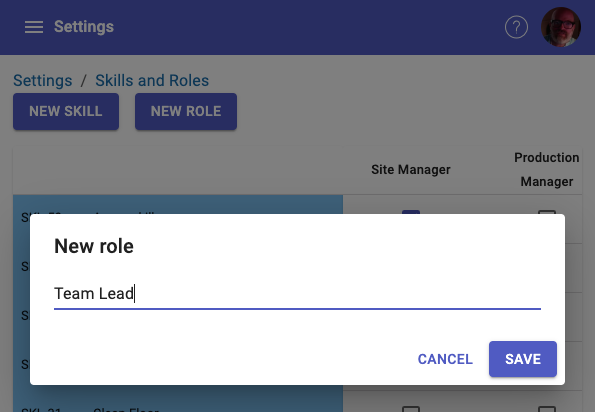
1. Create Roles
- Go to Settings > Skills & Roles (if you don't see this option, you'll need to ask an Admin for permission)

- Click the NEW ROLE button, add the Role name and Save
- Examples; Production Operator, Team Leader, Quality Manager.
- Each Role is listed in a column
-
Add as many Roles as needed. More can be added later on.

Create Skills
- Click the NEW SKILL button
- Add details to the Skill. You can edit most information later on, so don't worry if you don't have all the information
-
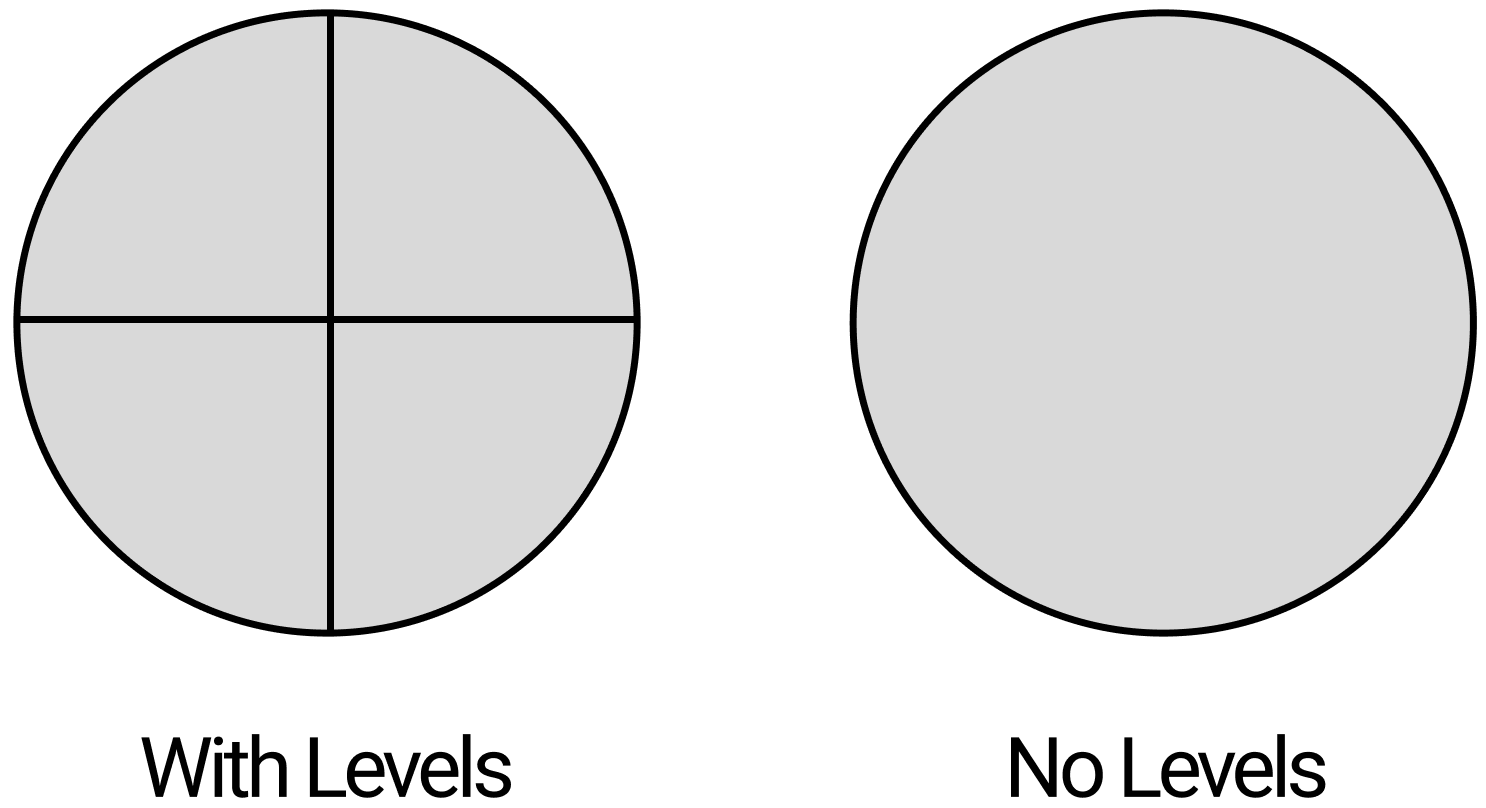
One field you do need to select is Multi Level or Single Level, since this cannot be changed later on. Multi Levels will be useful where a person develops over time. It is represented by a circle with 4 quadrants. Use Single Level for a compliance-style Skill, where you are either compliant or you're not. 1 or 0. Binary.
- Note that new Skills have an INACTIVE status after creation. This means they won't display on the Skills matrix or be assigned to anyone until you change the Status to ACTIVE. We'll do this a little later.

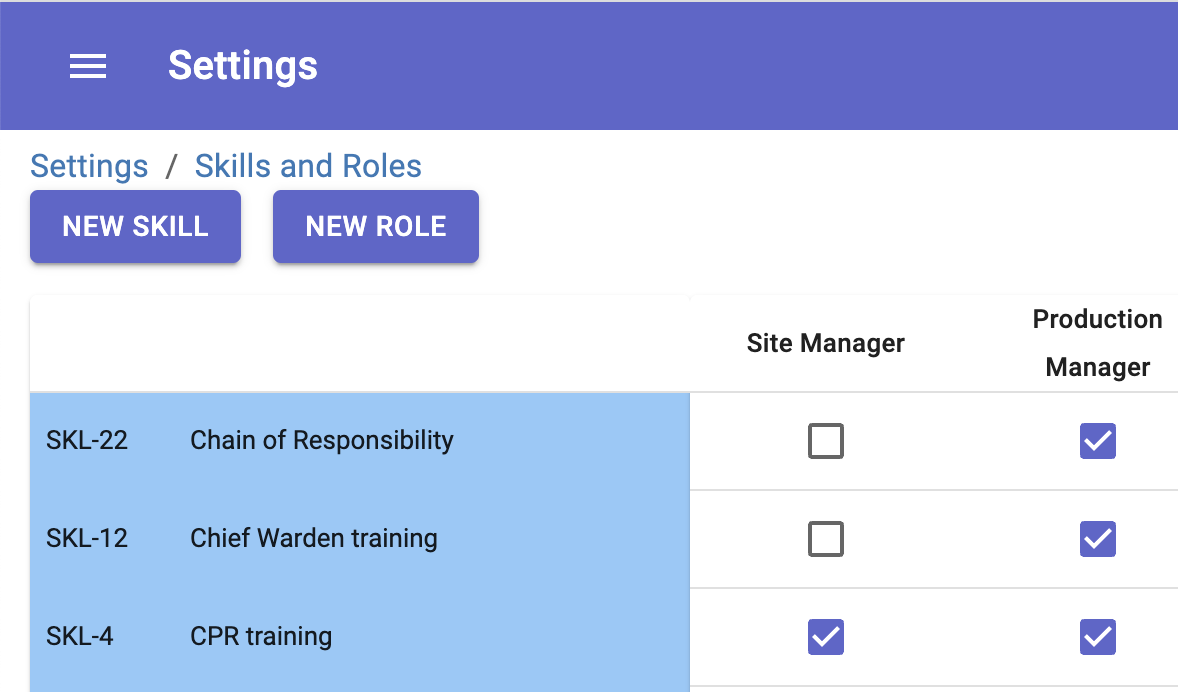
2. Assign Skills to each Role
-
Use the checkboxes to assign Skills to Roles

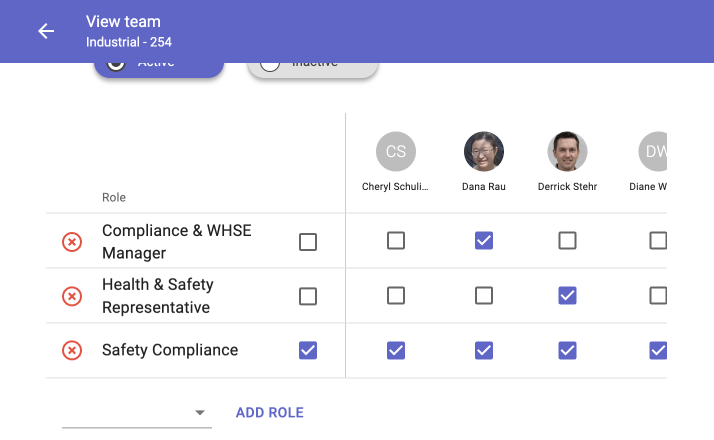
3. Add Roles to Team Members
- Go to Settings -> Teams
- Scroll to the end of the page. Use the drop down to select Roles and click ADD ROLE
-
Use checkboxes to assign the Roles to Team Members

4. Add Training Events (optional)
- These are similar to Checklists, and can be developed with Questions and answers (multiple choice, add a photo, complete a table etc), videos, instructional text, and more.
- A Training Event can be added per Level of each Skill. For example, there may be a different template for Levels 2, 3 and 4 (and none at Level 1)
- Typically a REVIEW step is added in the Training Event, so that the assigned person can do the training then send for review prior to the Level being marked Complete.
- Templates for each Level can be created new, or use an existing template, or copy an existing template (which can be further edited)
- When a person is assigned this Skill, a Training Event will be assigned. As each Level's training event is completed, it automatically assigns the next Level's Training Event (up to their assigned target)
5. Go Live: change Skill Status to Active
- Open each Skill you want to make live and change the status to ACTIVE. It will now display in the Skills Matrix and in each Team Member's Skill Profile.
- If there are Training Events in the Skill, they will automatically be assigned
Step-by-Step Guide to setting up your Skills Matrix
Creating a New Training Event
Navigating Skills module
Refresh a Training Event - Multi-level
Refresh a Training Event - Single level
Navigate to Training Events